Table of Contents
02 Getting Started
Setup
Authentication
For authentication with the GitLab REST API, you need to create and provide a Personal Access Token.
You can create and maintain access tokens in your GitLab user's preferences page (eg at https://gitlab.com/-/user_settings/personal_access_tokens) by pressing the “Add new token” button and then selecting the appropriate scopes. api needs to be selected.
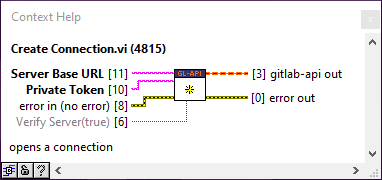
The Create Connection.vi expects the value of the previously created token for its Private Token input:
Configuration
The toolkit comes with a helper VI that reads the access token from a configuration file. This VI only serves as an example of how the private token could be stored and provided.
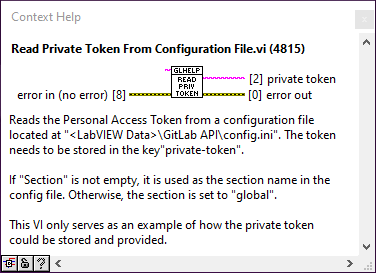
Read Private Token From Configuration File.vi reads the Personal Access Token from a configuration file located at <LabVIEW Data>\GitLab API\config.ini. The token needs to be stored in the key private-token.
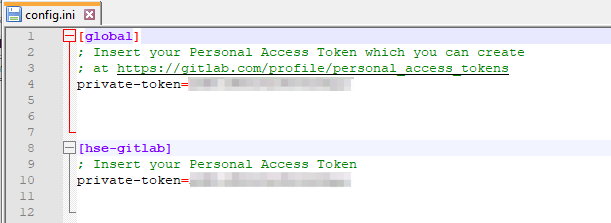
If “Section” is not empty, it is used as the section name in the config file. Otherwise, the section is set to “global”.
Example
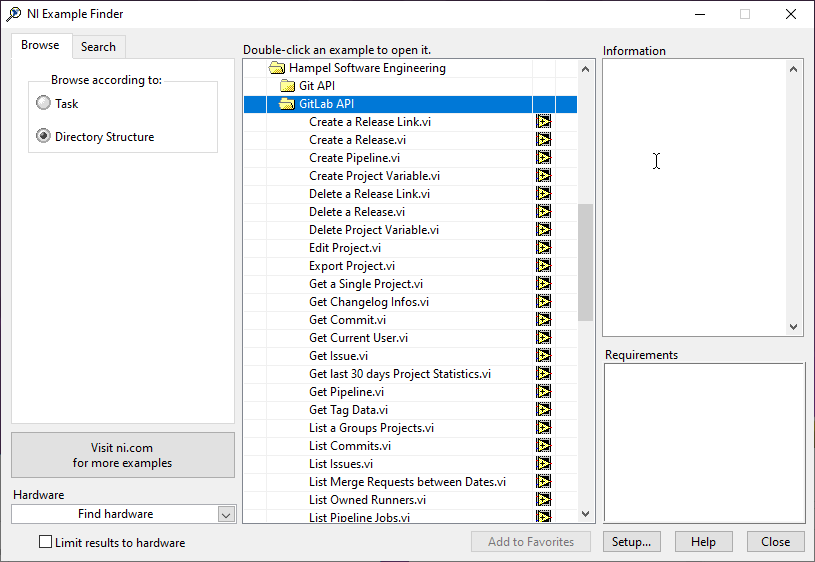
Example Finder
The API ships with several examples which you can browse from the Example Finder (“Help → Find Examples…” menu item in the LabVIEW IDE), In the NI Example Finder, browsing the directory structure, navigate to \Hampel Software Engineering\GitLab API where you will find a number of example VIs.
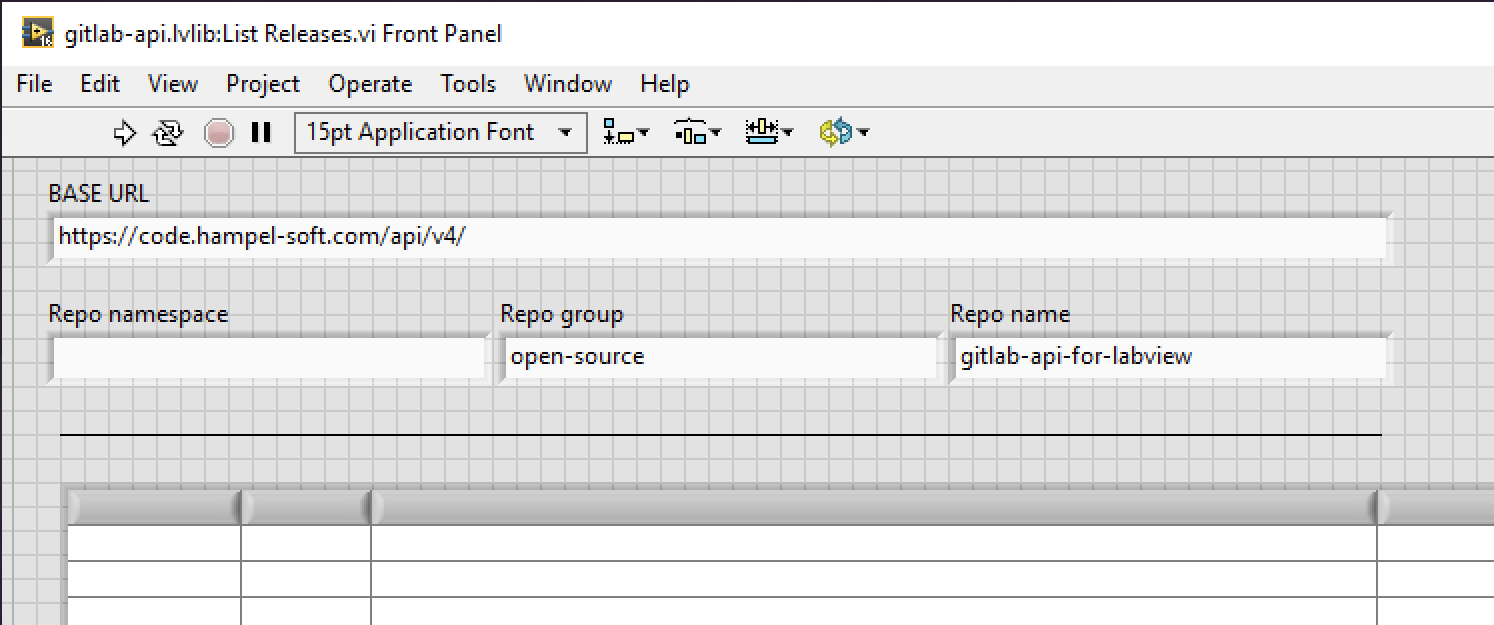
List Releases.vi
One of the shipping example VIs is List Releases.vi:
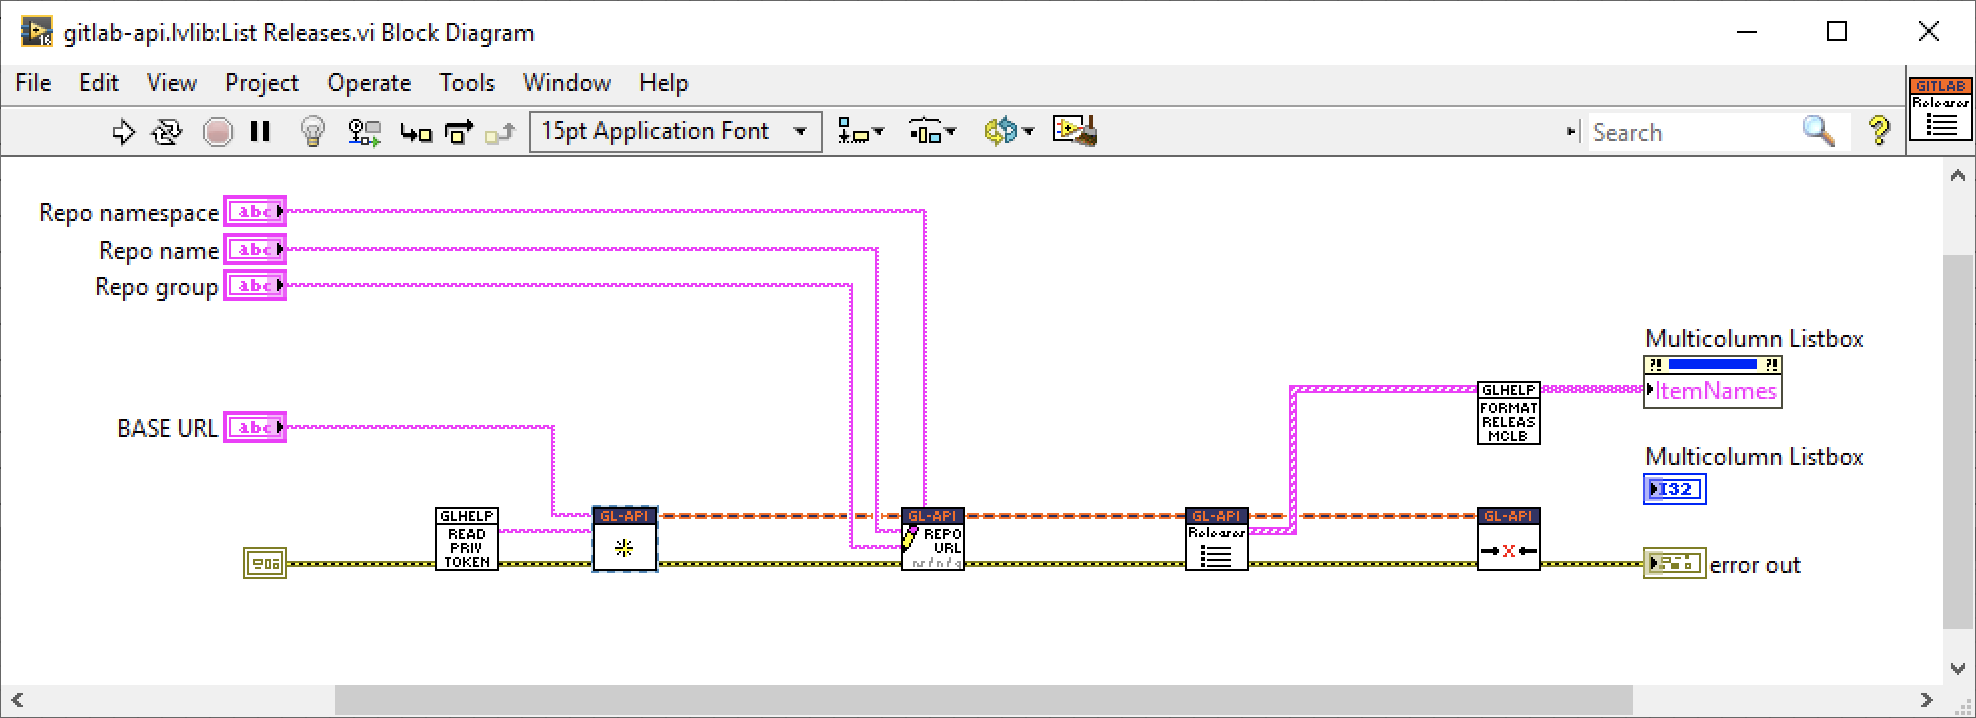
The basic pattern is always the same:
-
Create the connection from Server Base URL and the private token
-
Set the repo URL
-
Execute the API request (“List Releases” in this case)
-
Close the connection
As the screenshots show, the VI requires four parameters (much like all other methods):
-
Server Base URL (required)
-
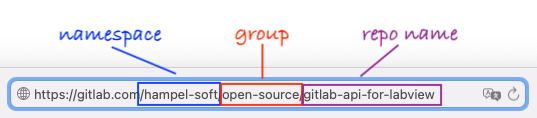
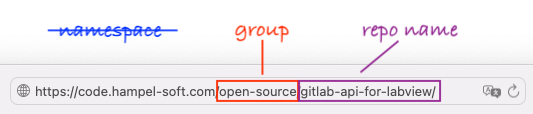
Repo Namespace (optional)
-
Repo Group (optional)
-
Repo Name(required)
The Server Base URL must include both “api” and the API version, and a trailing slash. An example value is https://gitlab.com/api/v4/.
The other three parameters make up the URL to the project in GitLab. See the following screenshots for further details: